
My yogurt making process. I shared a little information with you last week about the doctor suggesting an expensive yogurt for my mom, and the affordable option I found with just a little research.
I spent several hours researching the ingredients of a very expensive yogurt one of Mom’s doctors recommended. When I found the yogurt starter at Amazon I ordered it and got right to experimenting. I’ve had a few missteps, but this is my process for now.
- Gather up your equipment and ingredients.
- One half gallon of milk
- Yogurt starter
- Quart jars
- Food thermometer
- Plastic wrap
- Insulating system
- Dutch oven with lid
- Pot Pouch or small cooler
- Heat the milk to 185*
- I used a microwave for this. I cover the top of the jars with plastic wrap then put two quart jars in for six minutes.

- Cool to 118*
- After carefully taking out the jars, I pop a food thermometer through the plastic wrap and set the jars out to cool. I find it takes about one hour to cool from 180* to 118*.
- The plastic wrap helps reduce the skin that develops on top of the milk during the cooling process.
- Use 1/8 teaspoon starter per pint
- I suggest spooning out three or four tablespoons of milk into a little bowl to mix the starter in then putting it into the jar.
- Place a lid on the jars.
- Add liquid flavor
- I like mine with honey and vanilla. I put three tablespoons of honey and 1/2 teaspoon vanilla in a quart.
- Add the liquids BEFORE your incubate, otherwise you will end up with a yogurt drink.
- Insulate between 8-12 hours.
- Place jars in the Dutch oven, or small cooler
- Run hot tap water and adjust until it is around 110*.
- Add enough water to reach just under the neck of the jars.
- I put the food thermometer the water to monitor the temperature at a glance.

- Set the Dutch Oven in the Pot Pouch, place the lid on, and enclose tightly.
- Let stand undisturbed for 8-12 hours. The longer the tarter.

- Refrigerate 2 hours
- Remove jars from incubation, check for firmness. If watery place back in insulation for four more hours or so.
- If your yogurt is set (firm) refrigerate for two hours to stop fermentation.
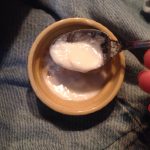
- Enjoy adding fruits just before eating.
- I found adding liquids at this point makes the yogurt watery, but adding fruits gently just before eating works out nicely.
- Consume within two weeks.
And there you go. My yogurt making process.
I also suggest a “dry” run on the incubator to make sure it holds heat properly. You need to hold the internal temperature between 90* and 110*. This is the optimum temperature span for the yogurt fermentation. Set up your incubating system and let it go for 12 hours. If the temperature is less than 90* after that period you should look at using something else.

I would love to know about your yogurt making.