
Peas are more than just a sweet spring snack; for the suburban homesteader, they are a strategic asset. They’re one of the first crops you can get in the ground, they provide a vertical wall of food in tiny spaces, and they actually leave your soil better than they found it.
If you want to maximize your calorie-per-square-foot ratio and ensure your seed bank isn’t full of “duds,” follow this blueprint for the perfect pea harvest.
1. The Quality Control Check: Pre-Sprouting on a Damp Towel
Why waste precious garden space and time on seeds that might not even wake up? For a prepper, efficiency is everything. Pre-sprouting (or “chitting”) your peas indoors gives you a 100% success rate once you hit the dirt.
- The Setup: Dampen a paper towel or clean rag. It should be moist, not dripping.
- The Placement: Space your pea seeds out on one half of the towel, fold the other half over, and slide it into a zip-top bag (leave it slightly unzipped for airflow).
- The Wait: Keep the bag in a warm spot (like the top of the fridge). Check daily. Once you see a tiny white “tail” (the radicle) poking out—usually in 48 to 72 hours—they are ready for the field.

Pro Tip: This method is the ultimate way to test the viability of older seeds in your long-term storage. If they don’t sprout on the towel, don’t bother giving them garden space.
2. Transitioning to the Dirt: Planting with Purpose
Peas love cool weather, so as soon as your soil can be worked in the spring, it’s go-time.
- Depth and Direction: Poke a hole about 1 inch (2.5 cm) deep. Place the sprouted seed carefully with the little white tail pointing down.
- Spacing: In a micro-homestead, forget the long, traditional rows. Plant in “blocks” or double rows to maximize your footprint. Space seeds about 2 to 3 inches apart.
- Soil Prep: Peas are “nitrogen fixers,” meaning they pull nitrogen from the air and store it in their roots. You don’t need heavy fertilizers, but a bit of compost mixed into the top layer will give them the boost they need to climb.

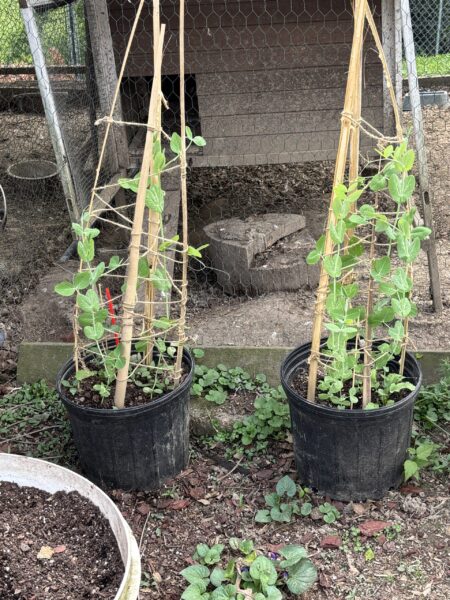
3. The Vertical Advantage: Building Your Trellis
In a suburban backyard, you don’t have an acre to spread out, so you must go up. Peas have tiny “fingers” (tendrils) that look for anything to grab onto. If they can’t find a lift, they’ll flop over and rot.
- The Support: You can use store-bought cattle panels, but a true prepper looks for multi-use or recycled materials. Old chicken wire, twine strung between two stakes, or even pruned branches (the “pea brush” method) work perfectly.
- Height Matters: Check your seed packet. “Bush” peas only need 2-3 feet of support, while “Pole” or “Tall” varieties can easily hit 6 feet. Build for the variety you have.

4. Maintenance and the “Micro-Homestead” Care Routine
Once they start climbing, peas are relatively low-maintenance, but they aren’t “set it and forget it.”
- Watering: Peas have shallow roots. They need consistent moisture, especially once the flowers appear. If the soil feels dry an inch down, give them a drink.
- Mulching: Use straw or shredded leaves at the base of the plants. This keeps the roots cool and prevents moisture from evaporating—essential for when those late-spring heat waves hit.
- The Advanced Move: When the season ends, do not pull the plants out by the roots. Cut the vines off at the soil level and leave the roots to rot in the ground. All that nitrogen they “fixed” will stay in the soil, acting as a free, high-quality fertilizer for the heavy-feeding crops (like tomatoes or peppers) you plant next.
Mastering the humble pea is your first step toward a high-yield, self-sustaining suburban plot.
#suburbanhomesteading #preppergarden #microhomesteading
